Rapid RC
▼
Thursday, 25 January 2018
Finding the cg for Extreme wot 4
Hi folks
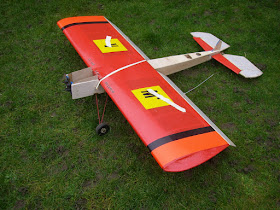
Needed to find approx cg position for ni-cads in the model, set it up on the dining room table (I have a special license for cg setup on the table). Looks like it is ok to place the two main nicads in the front compartment behind the engine and the other 4.8v ignition nicad to be re-positioned some were else to optimize the cg. Also got a reading on how much it weighs. The cg measurement is measured from the front of the sensor to the inbuilt laser pointer at 175mm which equates to approx 115mm from the L.E.
RcFly
Wednesday, 24 January 2018
Nearly there, Extreme Wot 4
Hi folks
Nearly finished now, fitted the silencer and U/C and the cowl. Modified the front wing dowels thought they were a bit to short to carbon rod all glued in place. Next job tonight is to determine roughly were the batteries need to be in relation to the CG.
RcFly
Nearly finished now, fitted the silencer and U/C and the cowl. Modified the front wing dowels thought they were a bit to short to carbon rod all glued in place. Next job tonight is to determine roughly were the batteries need to be in relation to the CG.
RcFly
Tuesday, 23 January 2018
Friday, 19 January 2018
Extreme Wot 4
Hi folks
Assembled and glued the silencer cradle and put some blocks in for straps to be screwed.
Just sorting out the P clips so I can attach the silencer but needs painting before final fitting.
RcFly
Assembled and glued the silencer cradle and put some blocks in for straps to be screwed.
Just sorting out the P clips so I can attach the silencer but needs painting before final fitting.
RcFly
Extreme Wot 4
Hi Folks
Sorted out the measurments yesterday for the silencer and did a CAD drawing.
Cut out the parts ready for assembly tonight.
The plate will be clamped between the U/C and the fus.
RcFly
Sorted out the measurments yesterday for the silencer and did a CAD drawing.
Cut out the parts ready for assembly tonight.
The plate will be clamped between the U/C and the fus.
RcFly
Thursday, 18 January 2018
Extreme Wot 4
Hi Folks
Had a nice trip out to rapid rc on sunday looking at exhaust systems for the DLE. Found a suitable system which should do the job and keep things quite. Great people for a chat and a fantastic cup of tea for myself and my partner. Had to dremel some of the bottom balsa for the header pipe to fit and lined it with carbon for strength and heat protection.
Next stage is positiong the system and seeing how to fix the pipe in position got some pclips off ebay and trimmed them to suit. Looks like I need to do some CAD drawing to make a platform and support saddles.
RcFly
Monday, 15 January 2018
Sunday, 14 January 2018
Had a few members now ask me who Trigger is....so heres a lil reminder ;)
https://youtu.be/BUl6PooveJE
Saturday, 13 January 2018
Thursday, 11 January 2018
Extreme Wot 4
Hi folks
Decided yesterday to do some vinyl work so made up the new vinyls for the wot 4. Allot better than the ones supplied in the kit no cutting around the shapes and leaving the clear plastic on the model.
All ready to apply.
RcFly
Decided yesterday to do some vinyl work so made up the new vinyls for the wot 4. Allot better than the ones supplied in the kit no cutting around the shapes and leaving the clear plastic on the model.
All ready to apply.
RcFly
Wednesday, 10 January 2018
wot 4 extreme
Hi folks
A bit more progress last night decided to make up the battery wiring harness and install the CDI also installed the on board tach. I think I have enough batteries for a couple of flights at least before re-charging. The wot 4 extreme I believe has cg problems (servos at the rear?) so I should have enough weight to play around with.
RcFly
Tuesday, 9 January 2018
Monday, 8 January 2018
Extreme Wot 4
Hi folks
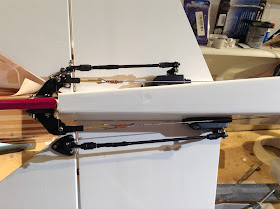
Worked on the rear end all finished elevator, rudder hinging all glued and working. The controls for the rudder and elevator are all connected with 3mm ball links and working great. Fitted the tailwheel bracket as I was screwing the screw in I took off the head off the screw (dodgy metal) and could not remove it so had to drill a extra hole in the bracket and put some proper screws in.
Started to redo the graphics the sheet they supplied you have to cut round the clear not keen on doing that so I have redrawn them to be cut out on a vinyl cutter as pure letters.
Sunday, 7 January 2018
Friday, 5 January 2018
Wot 4 extreme
Hi folks
Worked on fitting the tailplane the slot was a bit tight but carefull sanding sorted it out. Placed a straight edge on the wing seating and alligned the taiplane up for gluing with PVA and CA. Next worked on the fin which was very loose in the slot had to add some 1/32 balsa to the balsa sides and sanded down to a snug fit also had to add about 3mm balsa to the base so it sat on the tailplane for gluing. Glued in place with squares using Epoxy/PVA and CA.
Fitted the rudder servo and powerbox no problems loads of room and rudder fittings (3mm balllinks not supplied clevis).
RcFly
Thursday, 4 January 2018
Extreme Wot 4
Hi Folks
Progressing along well found the first problem with the elevator servos. The rear servo is to deep so had to use some 3mm packing to clear the inside fus. also turn both servos around 180 deg. so the wiring was clear from rubbing against the other servo. So the supplied pushrods have to be remade.
RcFly
Progressing along well found the first problem with the elevator servos. The rear servo is to deep so had to use some 3mm packing to clear the inside fus. also turn both servos around 180 deg. so the wiring was clear from rubbing against the other servo. So the supplied pushrods have to be remade.
Applied PVA glue to all the joints in the fus for added strength and drilled 3 x
3mm drainage holes in bottom of fus for spillages or leaks and then fuel proofed all the insides. Fitted supplied tank no problems.RcFly
Wednesday, 3 January 2018
Wot 4 Extreme update
Hi folks Happy New Year to all
Engine now installed and cutouts dremeled in, forgot the plug lead hole do that tonight. Servos are in place for throttle/choke, powerbox switch in place and the filling valve. No problems so far.
Engine now installed and cutouts dremeled in, forgot the plug lead hole do that tonight. Servos are in place for throttle/choke, powerbox switch in place and the filling valve. No problems so far.


